Here goes!
Crafting Part One
String Things!!
You will need:
1 L of PVA glue
Corn flour
Balloons
Sorbolene/Vaseline
String (any string will work, steer clear of using knitting yarn though) and lots of it. I had about 120m of string.
Pole (broom handle works well)
Tarp/Garbage bags/Boxes/Old Towels
Two chairs
Bowl/Tray ok to get gluey
Bowl/Tray ok to get gluey
Some time, and a willingness to get messy

Step Four:
Get your messy on.
It was easiest if I unravelled a whole bunch of string, and put it all into the glue mixture, then ran the string through my fingers to get the excess glue off before attaching to the balloon.
Start at the top of the balloon, and don't work systematically. It will look better if there are uneven gaps in the string. Continue until you are happy with the coverage.

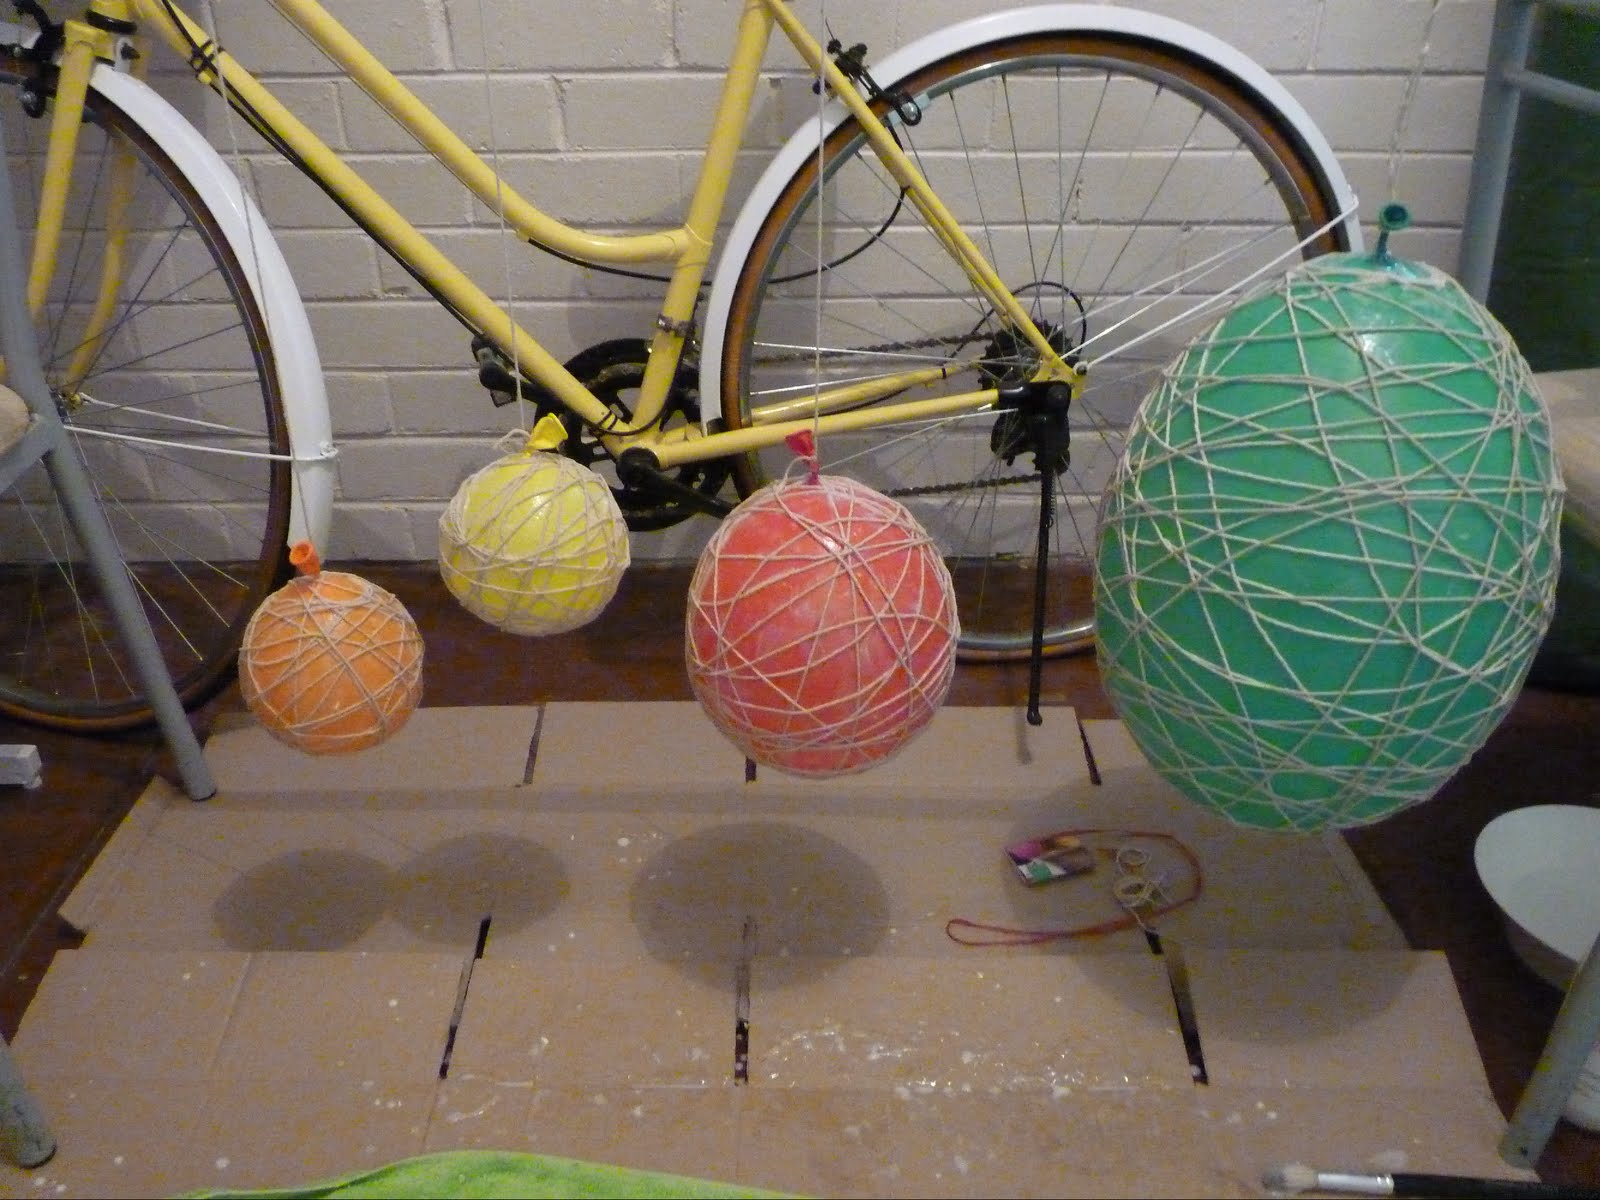
 This is what it should begin to look like. I ran out of string at this point. This is 40m of string, so you will need LOTS!!
The green balloon will hopefully be my lampshade, so It got a second coat of string.
 The smaller balloons will hopefully turn into a wicked hanging, all strung together and woven through with some coloured ribbon.
Step 5:
Wait for over 24 hours.
Cut the knot off the balloon, and as the air comes out it should peel away from the string leaving you with a nice round string thing!
Note: I found that when dry the strings started to peel away from each other, another coat of glue mix over the whole balloon with a paint brush and more time to dry, solved this.


Step One:
Set up your two chairs back to back, and affix the pole to them. I was lucky enough to have chairs with holes in them, so I didn't need to tie the pole down. You want to make sure you are in an area of house that is ok to get a little messy or is easily cleaned.
Lay down your protective covering under the pole I used boxes and a towel for the comfort factor, and used the chairs to keep them in place.
Step Two:
Blow up balloons to various sizes, the rounder the better. Attach string to the top of the balloon and then attach them to the pole. Hanging at different heights, and spaced well is a good idea.
Coat each balloon in a lot of Vaseline/sorbolene. If you are planning on using the string balls as a lamp shade (which I was for one) be sure to mark a space around the balloon knot so that there is space to fit the light bulb inside.
Step Three:
Create your glue mixture. I didn't measure anything, so this is just a guess. Use your bowl/tray.
Mix 300ml of PVA glue with 1/2 cup of warm water and 1/2 cup of corn flour. Mix until smooth.
I think mostly the water and corn flour are there to stop the glue hardening in the bowl. It was slow work and the glue didn't change consistency, even when left over night in the bowl. It does however make nice stiff string in the final product.... go figure!
Step Four:
Get your messy on.
It was easiest if I unravelled a whole bunch of string, and put it all into the glue mixture, then ran the string through my fingers to get the excess glue off before attaching to the balloon.
Start at the top of the balloon, and don't work systematically. It will look better if there are uneven gaps in the string. Continue until you are happy with the coverage.

Keep your friendly neighbourhood house mate (Althea version) on hand to pull up your sleeves for you when it gets too messy.

The green balloon will hopefully be my lampshade, so It got a second coat of string.
Step 5:
Wait for over 24 hours.
Cut the knot off the balloon, and as the air comes out it should peel away from the string leaving you with a nice round string thing!
Note: I found that when dry the strings started to peel away from each other, another coat of glue mix over the whole balloon with a paint brush and more time to dry, solved this.

Finished product.
Step Six:
Style as wanted!
I'm using one as a lampshade, and will probably string the others up as a ceiling hanging to decorate the corner of my room that gets light shone on it, but is rather empty.
Stay tuned for Part Two, where I will show you the finished product and how to hang them. Although I'm sure you all know how to hang stuff.
Ex
Ps: Feeling the enjoyment out of a craft how to? I am!
winner! emily this is fabulous (both the blog challenge and the string things). I didn't know at first what they were, but they are so neat. I want to make some! x
ReplyDeleteI am so excited... I am about to take the balloons out of them and turn them into an awesome craft hanging of goodness!
ReplyDelete